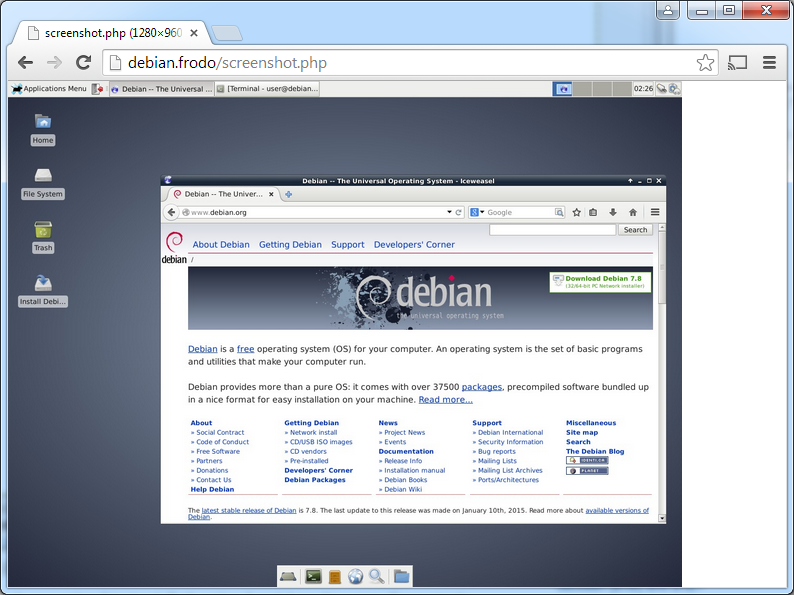
This is useful for kiosks and information displays. I use this for monitoring digital signage. It makes screenshots available through a PHP script on an Apache webserver. It doesn't take into account any security or access control, which is left as an exercise for the user. The xwd tool captures images from the running X server for you. You shouldn't use this to spy on users, however it does demonstrate just how much power the root user has on a multiuser system.
The basis for this article is allowing the xwd command to be executed under the context of the user running the X session.
The xwd output format is a raw "specially formatted dump file". Gimp can open these files, and more importantly, so can ImageMagick. We'll use the Imagick PHP extension to convert the .xwd format.
This how-to is Debian specific, but packages for your distro should be similarly named.
Packages:
apache2
php5
php5-imagick
Sudo:
We want to run commands as the X user, from the user running the apache daemon. In this case, Debian runs apache2 as the www-data user. If you're unsure, while apache is running execute ps aux | grep apache and the username will be in the first column.
The sudo (substitute user do) command allows you to run commands as another user. The typical, preconfigured use for this command is to run commands as root. To get the functionality we want you'll have to edit the /etc/sudoers. Do not edit this file directly! There is a special tool for this, enter visudo.
visudo edits the sudoers file in a safe fashion, analogous to vipw(8). visudo
locks the sudoers file against multiple simultaneous edits, provides basic
sanity checks, and checks for parse errors. If the sudoers file is currently
being edited you will receive a message to try again later.
On Debian, visudo respects your editor choice, which you can configure with update-alternatives --config editor. Here are the basics you will add to your /etc/sudoers using visudo.
# Cmnd alias specification
Cmnd_Alias SCREENSHOT_CMD = /usr/bin/xwd
This directive just places the binary xwd into an alias group we have named SCREENSHOT_CMD. Next is the user details, typically under User privilege specification:
www-data ALL=(fred) NOPASSWD: SCREENSHOT_CMD
The above directive allows www-data, the apache user, to run the alias SCREENSHOT_CMD as user fred. Fred is the target user who will be running the xsession, substitute as needed. The ALL= prefix matches the machine hostname, if you were to distribute this file on your network. The NOPASSWD directive allows www-data to enter no password to run xwd. The www-data user typically won't have a password set anyways, it is blocked from normal logins.
Test sudo:
Now we can test the sudoers setup. If you are root, execute su - www-data. If you are not, execute sudo su - www-data. You will have basic terminal as the www-data user. Remember the apache2 binary is executed as the www-data user on Debian, but is dependent on distribution. Test xwd:
root@debian:~# su - www-data
$ whoami
www-data
$ sudo -u fred xwd -display :0.0 -help
usage: xwd [-display host:dpy] [-debug] [-help] [{-root|-id <id>|-name <name>}] [-nobdrs] [-out <file>] [-xy] [-add value] [-frame]
It worked! Note that this command with only work with fred logged in and running an X session. The -display is needed as you don't have the environmental variable $DISPLAY set. The :0.0 argument meant means localhost (no host specified before the colon), first screen on first display. You can of course set the DISPLAY variable yourself, but you'll have to do it every time you sudo as the www-data user doesn't have any amenities to help you. If you have a more complicated X setup, you'll have to adjust for it here.
After testing, you will have to restart your apache daemon. It won't have the proper sudo permissions updated until the www-data logs in again.
PHP:
The following is a quick PHP script to convert and output the xwd screenshot as a JPEG image. The default webroot on Debian is /var/www, where we will be placing this file.
<?php
// screen_shot.php
// Take a screen shot of the X server and serve as a JPG

/*
    WARNING: You are serving copies of your X display to anyone who asks for them!
*/

// You can set a DISPLAY variable if you like
//putenv("DISPLAY=:0.0");
// Target user
$x_user = 'fred';
// Execute the screenshot (specifying the display)
// -root
//  "This option indicates that the root window should be selected for the
//  window dump, without requiring the user to select a window with the pointer."
// -silent
//  "Operate silently, i.e. don't ring any bells before and after dumping the window."
$xwd = shell_exec("sudo -u {$x_user} xwd -root -silent -display :0.0");
if (strlen($xwd) > 0) {
  $im = new Imagick();
  // Import the binary captured from the screen
  $im->readImageBlob($xwd);
  // Ajdust to taste
  $im->setCompression(70);
  $im->setImageFormat('jpeg');
  // Output directly, image doesn't need to hit the disk
  header('Content-type: image/jpg');
  echo $im;
}

?>
Check on it with your browser and you should have the remote X display:
Success:

Remember:
"Don't be evil."